How To Integrate The Agora SDK In Flutter
- Technology
- WebRTC
- Agora
- Quickblox
- Twilio
- Flutter
Introduction
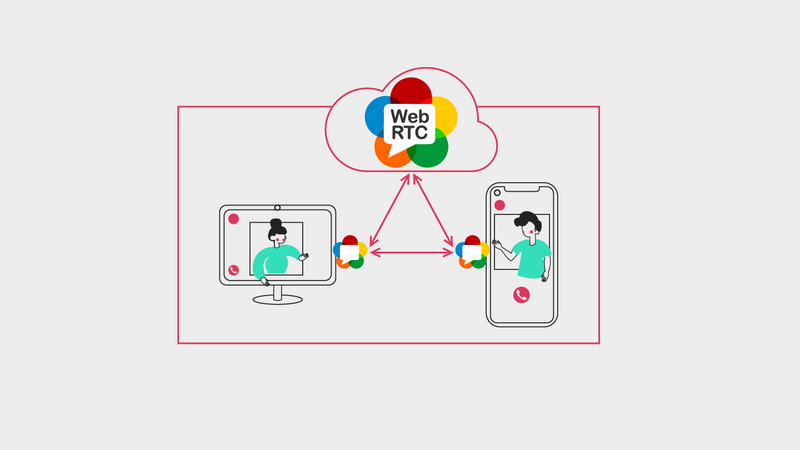
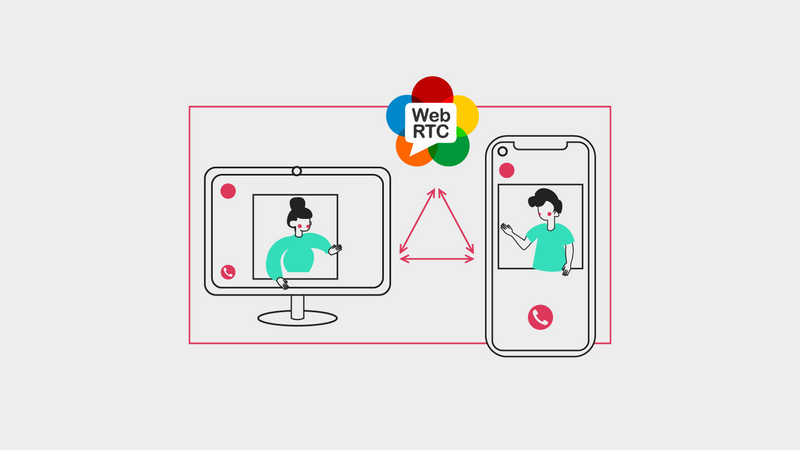
WebRTC is a peer-to-peer technology that allows for data transmission and user communication in real-time, bypassing a dedicated server. WebRTC arrived on the market in 2011. Initially, it was not particularly
useful for business as there was a substantial technological limitation: only Google Chrome supported it. Today however, nine years after its release, almost every desktop browser supports it.
Today, the personal computer is not the only device we use for communication as each of us owns a smartphone. These pocket-sized computers are often the primary working tool and the main device connecting us with others. However, mobile applications are the only viable option for WebRTC on smartphones as the support provided by mobile browsers is patchy. But this is not necessarily a bad thing, as mobile applications are the primary channels for content consumption on Android and iOS.
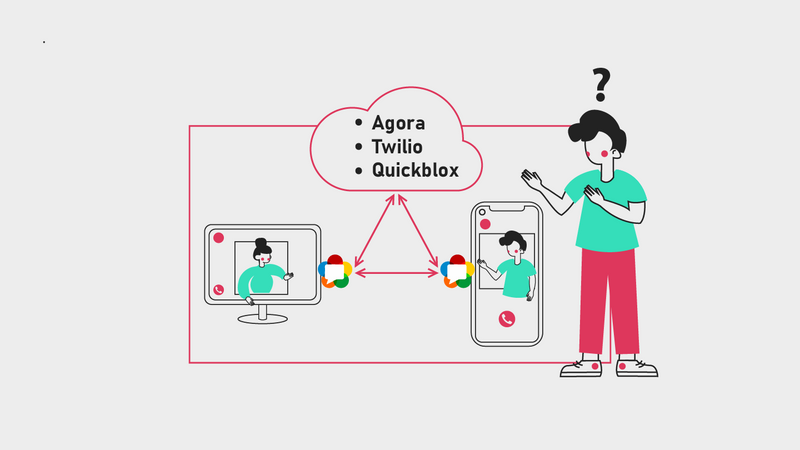
Many companies on the market try to facilitate the process of implementing WebRTC in mobile applications. Most of them offer their services under a pay-as-you-go policy, which means that we get the SDK and instructions to make implementation easy with no payment upfront. We only pay when people start using our application and only after crossing a free limit. This model means the scaling process is much easier, and we don’t have to worry about costs at first. Instead, we can focus purely on implementation.
I am Marek Gocał, the Lead Flutter developer at AllBright.io. Today, I will show you how to implement WebRTC in Flutter using these SDKs: Agora Voice SDK and Agora Video SDK. For now, we will focus on the implementation of the essential functions alone and ignore the UI. However, suppose you want to see how an application made with this SDK looks? In that case, we recommend you to check out our WebRTC application, Captio (link to the article or play store).
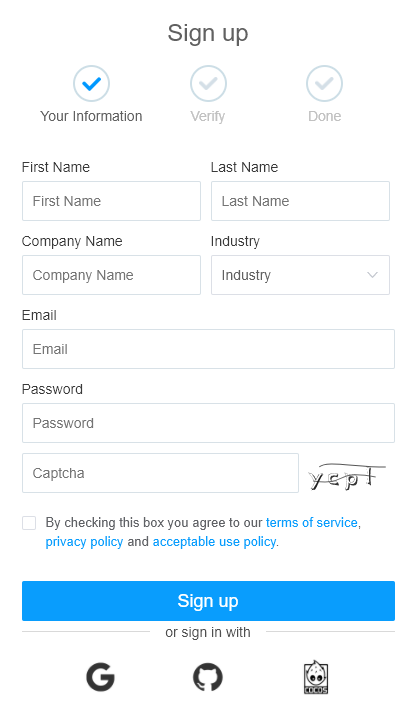
Developer account
The first thing to do when working with an external company’s SDK is to set up a development account on the company’s website. With Agora, we are given the option of registering using:
- Github
- Cocos
- An email address
For all of these, apart from the Cocos account, we also have to verify our phone number during registration.
The next step is to create a new project in the Project Management section and select an authentication mechanism. We have two options to choose from, App ID and Token.
App ID
The App ID provides a unique identity for the project. Each project has its own unique ID, used to initialize the Agora SDK. This solution is recommended in the test environment but strongly discouraged in production due to its low security. If someone found out about what our App ID is, then they could make calls to Agora API using this ID in their own applications, thereby exposing us to additional costs.
To get your App ID, all you need to do is create a new project.
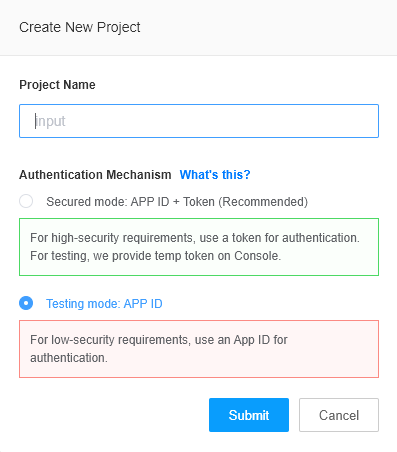
As soon as your account is created, an App ID is generated.

You can choose to use a token for authentication at any time. Simply go to the Edit section and enable an app certificate.
Token
A token is a dynamic key generated using an application ID, application certificate, user ID, channel name, token expiration time stamp, or other information. This is the authentication mechanism recommended for a production environment.
Once we have created our project and have our App ID, we can generate a token.
First, we need to turn on the App certificate and then Agora gives us two options:
- Primary certificate: You can use a primary certificate to generate tokens, including temporary tokens. You cannot delete a primary certificate.
- Secondary certificate: You can use a secondary certificate to generate tokens, except for temporary tokens. After enabling a secondary certificate, you can swap it for a primary certificate, or delete it.
If you chose a token as the authentication method when creating the project, then the primary certificate is already enabled.
For a test environment, we can generate a token by clicking on the key icon next to your App ID.
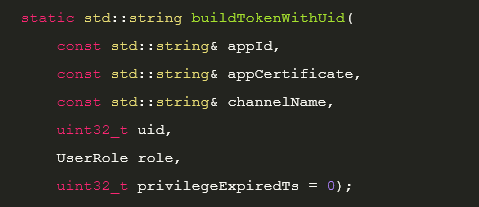
For a production environment, Agora recommends that your server generates a token by calling buildTokenWithUid.
Agora provides an open-source AgoraDynamicKey repository on GitHub, which enables you to generate tokens on your server with programming languages such as C++, Java, Python, PHP, Ruby, Node.js, and Go.
Here’s an example:
Recently, to ensure better security, Agora started phasing out support for App ID as an authentication method. This means that if we turn on the token authentication in our project (as the Agora developer guide recommends) and we remove ”No certificate”, the App ID authentication method is then unavailable to us.
Flutter project

Dependencies
Create a new Flutter project and add the following dependency to your pubspec.yaml file.

Depending on what functionality you plan to add, voice, video or file sharing, you first need to ask the user for permission to use the required tools.

From here on, we can access the same methods as when creating Android and iOS applications, because agora_rtc_engine package wraps the native SDK and allows you to call methods using Dart code.
Agora SDK

Despite the fact that Agora’s system works very well and the connection quality is excellent, the structure of Agora’s Flutter SDK presents a few issues. The package consists of several files with 1000+ lines each. Additionally, a number of methods seem to run the same parts of the native code as each other. This is not just an impression, as the methods are often unnecessarily duplicated. The whole thing is very chaotic and un-intuitive.
Initialization of the Engine
Before using the Agora engine, you must first initialize it. Building the engine can take up to 3-5 seconds, so consider adding a loading animation to prevent the user from thinking the application has frozen.
// All of the following methods are called on the rtcEngine instance
 final rtcEngine = await RtcEngine.create(YOUR_APP_ID);
At this stage, I recommend calling the following methods as well.
// Enables the video module (default mode audio only). Can be called before // or after joining the call. If you call this method, you will be able to // receive and send the video stream. Then to disable/enable local video
 // stream just call enableLocalVideo(bool enabled). this method will cause // the device to stop broadcasting video locally but will continue to
 // receive it.

await engine.enableVideo();

// In my experience, Agora engine sometimes uses the speakerphone mode by default, and sometimes earphone mode. This method allows you to set the default one. If you want to change the settings during the call, just call setEnableSpeakerphone (bool enabled)_

await engine.setDefaultAudioRoutetoSpeakerphone(true);
Events
An important but not very intuitive method is the one that returns information on the status of participants in a call. The method below uses callbacks that must be defined before users join their call. Let’s see what it looks like in an example.
    final eventHandler = RtcEngineEventHandler(
        onJoinChannelSuccess: (RtcConnection connection, int elapsed) {
        showMessage("Local user uid:${connection.localUid} joined the channel");
        setState(() {
            _isJoined = true;
        });
        },
        onUserJoined: (RtcConnection connection, int remoteUid, int elapsed) {
        showMessage("Remote user uid:$remoteUid joined the channel");
        setState(() {
            _remoteUid = remoteUid;
        });
        },
        onUserOffline: (RtcConnection connection, int remoteUid,
            UserOfflineReasonType reason) {
        showMessage("Remote user uid:$remoteUid left the channel");
        setState(() {
            _remoteUid = null;
        });
        },
    );
  // If you want to start listening for new type of events then you need to
  // create a new RtcEngineEventHandler object and pass it
  // to setEventHandler method

  await _engine.setEventHandler(eventHandler);
When it comes to what event will be broadcast and when, the documentation is not very clear. Often, a given event will return several types of events. Most of the events above should provide all the necessary information to display the connection status. Unfortunately, if you need other, more specific information, you need to identify the right callback from among nearly 100 others!
Join/leave channel
The Agora SDK uses rooms called channels. Each room can be joined by anyone with an authentication token and the room’s name.
await _engine.joinChannel(token, channelName, optionalInfo, optionalUid);

await _engine.leaveChannel();
Video Widget

Agora offers predefined widgets. It is a widget with a predefined resolution image that has no shape or size. For the remote widget, you need to pass the user ID from the userJoinde callback.
Widget localView() {
 if (Platform.isIOS) {
   return local.TextureView();
 } else {
   return local.SurfaceView();
 }
}

Widget remoteView(int uid) {
 if (Platform.isIOS) {
   return remote.TextureView(uid: uid);
 } else {
   return remote.SurfaceView(uid: uid);
 }
}
Additional methods
The above methods are the minimum necessary to create a fully functional audio-video application. Among other interesting methods, we find:
_engine.enableFaceDetection(enable);

_engine.switchCamera();

await _engine.startEchoTest(intervalInSeconds);

await _engine.setClientRole(role);

await _engine.setCameraZoomFactor(factor);

await _engine.setCameraExposurePosition(positionXinView, positionYinView);

await _engine.setCameraAutoFocusFaceModeEnabled(enabled);

await _engine.isSpeakerphoneEnabled();

await _engine.getUserInfoByUid(uid);

await _engine.getConnectionState();

await _engine.getCallId();
Bonus

If the deployment environment is Android, users in mainland China may get stuck here…

To solve this issue:
1. In the build.gradle file of the Android project, use mirrors in China for Google and jcenter.”
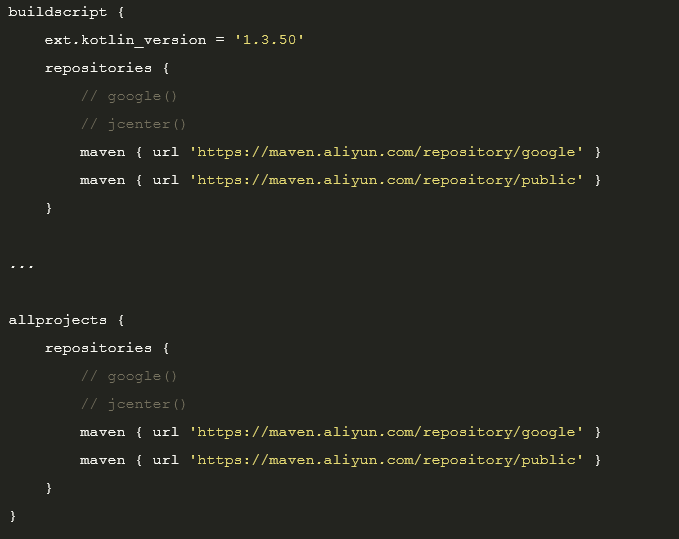
2. In the gradle-wrapper.properties file, set distributionUrl to a local file. For example, for gradle 5.6.4, you can copy gradle-5.6.4-all.zip to gradle/wrapper and set distributionUrl to:

Summary
It’s wrap up time! Agora_rtc_engine is a powerful library that, when used skillfully, allows WebRTC audio-vi deo modules to be implemented within our applications. For Flutter, it is one of the most effective options on the market today. However, it is also not perfect. The package itself is written in a chaotic manner, so people who are not familiar with the structure of the files may feel lost at first. Nevertheless, it doesn’t take that much to create a fully functional video chat feature. In this article, we covered the most important methods. Any additional ones offer optional functionalities which, in most cases, are not essential. I hope that after reading this, you will find it easy to create a fully functional application with an audio-video module. In addition, it should be remembered that Agora is constantly developing its support for Flutter and, most likely in 2023, it will gain support for Flutter web. However, this is the future. Today agora_rtc_engine offers everything needed to create an audio-video module in a mobile Flutter application.
If you need help implementing audio and video in your mobile application, feel free to contact me using marek@allbright.io